
Creating a flawless base makeup is the foundation for a polished and radiant look. Whether you prefer a natural or glam finish, achieving the perfect base is a makeup artistry skill worth mastering. Here are expert tips to help you create that impeccable canvas:
1. Prepping Your Skin:
Start with Clean Skin: Initiate your makeup routine by thoroughly cleansing your face with a gentle cleanser. This step removes dirt and excess oil, providing a fresh canvas for makeup. Consider incorporating a gentle exfoliation into your skincare routine a couple of times a week to ensure dead skin cells won’t interfere with your makeup application.
Moisturize: Apply an appropriate moisturizer for your skin type. It not only hydrates but also creates a smooth surface for makeup, ensuring it goes on evenly and lasts longer. Allow the moisturizer to absorb fully before proceeding with makeup to avoid a slippery base.
Sunscreen Protection: During the daytime, don’t forget to use sunscreen with at least SPF 30. Sunscreen safeguards your skin from UV damage, an essential aspect of skin health. Opt for a broad-spectrum sunscreen that shields against both UVA and UVB rays.
2. Primer Application:
Choose the Right Primer: Select a makeup primer that aligns with your skin type and specific concerns. Options include mattifying primers for oily skin, hydrating primers for dry skin, and color-correcting primers to address redness or sallowness. This essential step helps makeup adhere better and ensures a smoother finish. Additionally, consider using a pore-filling primer to minimize the appearance of large pores, providing an even canvas.
Even Application: Apply a small amount of primer evenly across your face. Pay extra attention to areas where makeup tends to fade or crease, such as the T-zone. A little goes a long way with primers; using too much can lead to a heavy or cakey look. Gently press the primer into your skin, allowing it to meld with your moisturizer.
3. Foundation for a Flawless Finish:
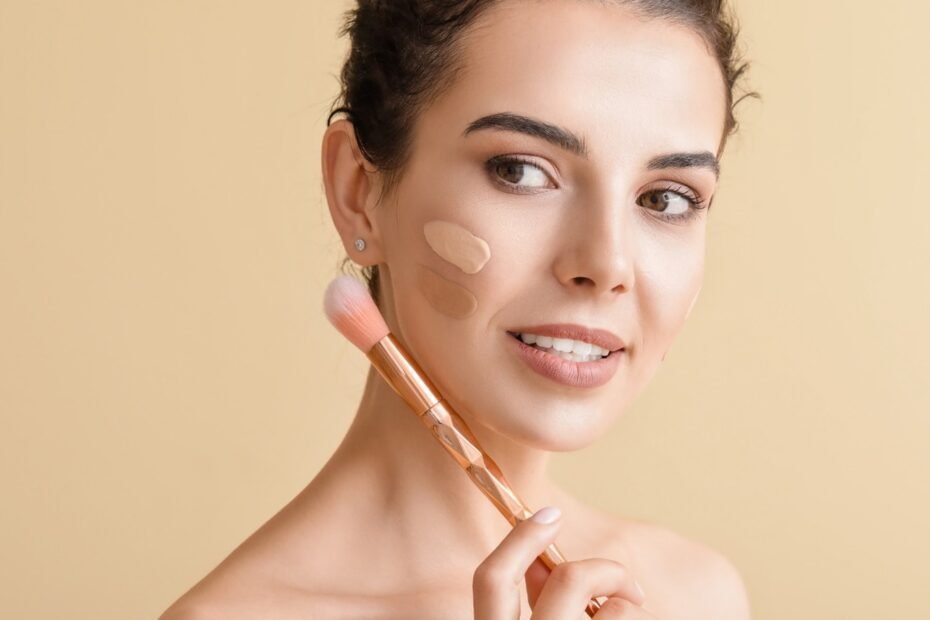
Find Your Perfect Shade: Pick a foundation shade that closely matches your skin tone. Test it on your jawline to confirm a seamless blend. Don’t forget that your skin tone may vary slightly between your face and neck, so ensure the foundation matches both areas for a natural transition.
Application Method: Use a makeup sponge, brush, or your clean fingertips to apply the foundation. Begin at the center of your face and blend outward for a consistent and flawless finish. Using a sponge or makeup brush can provide an airbrushed effect, ensuring an even application. For a more natural look, consider using your fingertips for a sheer, dewy finish.
Consider the Finish: Think about the finish you desire for your makeup. Different foundations offer various finishes, including matte, satin, and dewy. Matte foundations are excellent for controlling excess shine, while satin and dewy finishes provide a more luminous and youthful appearance.
4. Conceal and Correct:
Conceal Blemishes: Utilize concealer to cover up any blemishes, redness, or dark circles. Dab it lightly and blend gently to avoid cakiness. For blemishes or spots, use a concealer that matches your foundation shade. To brighten under-eye areas, choose a shade slightly lighter than your foundation.
Consider Color-Correction: If specific concerns like dark under-eye circles or redness are present, consider using color-correcting concealer (peach or orange for under-eye circles, green for redness) to neutralize them. Apply the color-correcting concealer sparingly before your regular concealer, ensuring an even and well-blended look.
5. Set with Powder:
Translucent Setting Powder: Employ a light, translucent setting powder to set your makeup. Concentrate on your T-zone if you have oily skin. Use a gentle hand to avoid over-powdering, which can make your makeup appear heavy. A setting powder not only extends the longevity of your makeup but also helps control shine throughout the day.
Application Technique: When applying setting powder, use a soft, fluffy brush for a light and even application. Press the brush into the powder, tap off the excess, and then lightly sweep it over your face. Avoid pressing too hard or using too much powder to prevent a dry or cakey look.
6. Blush and Bronzer for Dimension:
Blush Placement: Smile and apply blush to the apples of your cheeks for a healthy flush. Choose a blush shade that complements your skin tone; pinks and peaches are universally flattering. Cream blushes offer a natural, radiant finish, while powder blushes provide a matte or satin look.
Bronzer Enhancement: Add warmth and depth with bronzer. Apply it to cheek hollows, temples, and jawline. Matte bronzers are excellent for contouring, while shimmery bronzers can be used to achieve a sun-kissed glow. Blending is key to ensure a seamless transition between blush, bronzer, and your natural skin tone.
7. Illuminate Strategically:
Highlighter: To achieve a luminous glow, use a highlighter on the high points of your face: cheekbones, brow bones, the bridge of your nose, and Cupid’s bow. Highlighters come in various forms, including powder, liquid, and cream. The choice depends on your preferred finish; powder highlighters offer a more intense shine, while liquid and cream highlighters provide a natural, lit-from-within radiance.
Blend for a Seamless Look: After applying highlighter, blend it gently to ensure a natural, seamless effect. Use a clean brush or your fingertips to soften any harsh lines. Highlighter should enhance your features without appearing overly shimmery or glittery.
8. Set with Setting Spray:
Lock It In: Finish with a setting spray to set your makeup in place. It also provides a natural, skin-like finish. Setting sprays come in various finishes, including matte, dewy, and natural. Choose one that aligns with your desired look.
Spray Evenly: Hold the setting spray a few inches away from your face and spritz it evenly. Allow it to air dry. Setting spray not only helps your makeup last all day but also prevents it from transferring onto clothing or rubbing off.
9. The Touch-Up Kit:
Blotting Papers: Keep blotting papers handy in your bag for on-the-go touch-ups. Blotting papers absorb excess oil without disturbing your makeup. Gently press them onto oily areas, like your forehead, nose, and chin.
Pressed Powder: Alongside blotting papers, carry a compact pressed powder. A quick touch-up with powder helps freshen up your look and mattifies any shine. Use a soft powder brush or the included applicator for a light application.
Check our article: The Best Makeup Guide for Beginners: A Step-by-Step Tutorial